
You will love this book!
Thursday, December 19, 2013

I get no affiliate compensation what-so-ever for sharing this book review with you. I simply enjoy sharing things that have helped me to make it easier for you!
Modern Essentials: 4rth Edition
Overall Rating: ✩✩✩✩✩
Pros:This book is amazing, it is so in-depth and easy to use. When someone tells me a problem they are facing I go straight to the A-Z reference section that includes every type of ailment or oil you can think of from acne to ylang-ylang. Besides the awesome reference section this book has chapters that cover the history of essential oil usage, the chemical compounds of each oil, and detailed charts explaining where on the body and how to apply or massage the essential oils based on what type of problem you are facing. This is my go to book for essential oil use. I highly recommend it.
Cons: The only con I can find is that I do not posses the newest version. Right after I bought my copy a new version came out. 5th edition... go figure!!
Final Note: I do not personally own the pocket sized version of this book but I have heard that it is equally as useful. This is only a reference book and is not quite as vast as the hardbound version. The hardbound copy is text book size where the pocket sized book is approximately 4 inches tall and easy to carry with you.
So, let me know what you think about the book in the comments section below.. and I hope you have an awesome weekend! -Kayla
Womens Health: From family planning to menopause.
Tuesday, November 26, 2013

This post is for all of the women out there, seriously.. if you are a woman I am sure you can benefit from this post in one way or another! If you are a man, you would probably prefer a different article! Like this one (Rosemary Mint Shaving Cream)
My story:
I decided to write this roundup post because one of the first things I looked into when making holistic changes in my life was my monthly cycle. The worst part about my story is this: I decided to leave my health in the hands of companies that were looking to profit off of me versus help me heal.
When I was fifteen I started a period cycle that would last for two years. I'm serious.. two years of daily, heavy, continuous bleeding, and cramping. I was always tired, I had severe motivation problems, although I played sports and kept up my straight A's in high-school, when I came home from school I slept... a lot!
My mother took me to an OBGYN that she trusted, and the first medication I was given, of course, was the pill. While the birth control pill usually gave the consumer a light monthly period, mine got worse. Then they tried the Depo shot, next was the Depo shot un-diluted; both failed horribly and honestly just made me feel worse. The doctors were astonished that I was loosing that much blood and wasn't bed-ridden.
Two years later (at seventeen years old) when the doctors ran out of birth control options, I had an exploratory surgery. The surgeon found out that I had a rare cyst on one of my fallopian tubes and Endometriosis. This surgeon/ OBGYN decided to try an experimental shot that was typically used in treating prostate cancer on me.. called Lupron Depot.
I remained on this shot for two years, and while it stopped the bleeding it had MANY negative aspects. A well known side effect of Lupron for women is that the shot sends your body into false menopause (yes I was 17 with hot flashes, mood swings, etc). You also have to take calcium supplements to prevent an early onset of osteoporosis. When I was 19, and met the love of my life we decided as a couple that I should try to come off of this shot. Just on the off chance that I ever wanted to have children.
You have to wait one year, per six months of taking the shot, before your monthly cycle returns to normal and you can even think about having children. After I quit taking the shot it was four years before I began having a regular period again, during those four years I would have a few days of spotting but that was always around six months apart. I have had regular periods again for a little over a year now and I'm now dealing with the pain of Endometriosis again, but I am SO thankful to be off of that horrible medicine. My bone and teeth health is something I am also working to rebuild since I was neglectful and did not take my calcium supplements during treatment.
-Another example (so I don't sound quite as crazy) of a terrible Lupron experience: http://articles.mercola.com/sites/articles/archive/2002/02/09/lupron-part-one.aspx
-My personal choice for relief during discomfort caused by endometriosis is a roller bottle with fractionated coconut oil and 10 drops of eucalyptus.
-For other Natural Endometriosis treatments/ recipes look here: http://theresanoilforthat.blogspot.com/2009/04/endometriosis.html
For the remainder of this Women's health related round up post, I will share helpful links that I have found while researching holistic health. These are topics that specifically relate to women's health. Since I have been through false-menopause (for two years) I also felt the urge to include some menopause related links! I hope that this information helps you as much as it has helped me!
"The Change" (aka: Menopause): http://www.oil-testimonials.com/essential-oils/2484/clary-sage-for-hot-flashes-menopause-insomnia
|
| I love the cloth pad tutorial by littlehouseliving.com |
Menstrual Cycle:
Synchronizing with the Moon: http://empoweredsustenance.com/balance-hormones-with-moon/
 |
| Natural Family Planning post by How We Flourish |
Family Planning:
Reasons to consider opting out of birth control: http://www.howweflourish.com/2013/08/26/why-you-should-avoid-hormonal-birth-control/
Natural Family Planning: http://www.howweflourish.com/2013/08/30/natural-family-planning/
Natural Infertility Solutions: http://wellnessmama.com/1326/how-to-get-pregnant-naturally/
Wellness Mama Instructions on how to make a natural labor and baby Kit: http://wellnessmama.com/2541/make-your-own-natural-labor-and-birth-kit/
Where should you give birth? http://www.keeperofthehome.org/2012/02/a-comparison-of-birthing-settings-home-hospital-and-birthing-center-births.html

Teas & Tinctures:
Feminine Balance Tea: http://realfoodoutlaws.com/feminine-balance-tea/
Teas to help cramping: http://overtheteacups.com/teabriefs/herbal-teas-help-menstrual-cramps/
Tumeric Tea: http://wholenewmom.com/health-concerns/menstrual-cramps-remedy-heavy-bleeding-remedy-turmeric-tea/
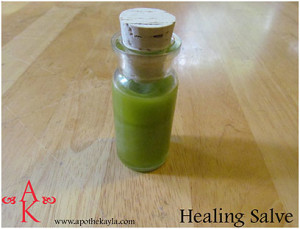
Apothekayla's Healing Salve: yep healing salve is "tha bomb" this mixture also helps your menstrual cycle, simply rub it on your abdomen: http://www.apothekayla.com/2013/04/cuts-scrapes-or-burns.html
Well my friends as always I want to thank you for reading! Without you, I wouldn't do what I do! Let me know if this roundup post has helped you, and if you love any of the linked posts please show the post author some love by commenting or joining up with them on your social networking sites! Until next time -Kayla! =]
Rosemary Mint Shaving Cream
Wednesday, November 6, 2013

I asked you all, over on the Apothekayla Facebook page, which recipe you wanted me to write about first, and the shaving cream won.
Shaving, why do we do it and why does it have to be so complicated? Personally I feel it is purposely made to be complicated so we have to purchase several products in order to have the closest, longest lasting shave possible, and if your shaving cream irritates your skin don’t worry; there is a product for that too!
Why we do it is another question that personally I think is entirely cultural. All humans have leg hair, arm hair, most men and some women around the world have face hair.. it’s natural. Why do most humans shave off their hair in the attempt to pretend it was never there in the first place? I think most of us associate not shaving with looking like a caveman, so to prevent caveman syndrome I will share this rosemary mint shaving cream with you and tell you why it’s awesome!


This is a recipe that I took great care in perfecting. My husband and I both have sensitive skin, conventional shaving creams usually leave our skin irritated and extremely dry. I tried several different combinations of ingredients before I nailed down the perfect recipe. My husband uses this shaving cream on his face and each time he uses he says “I can’t believe how well this shaving cream works!” His face feels baby smooth and he smells great, there is no need for stinky astringent/ toner because it is included in the recipe! I use this shaving cream on my legs and under my arms. I like to rub it on my legs before I get in the shower so it has time to moisturize the hair follicle and my skin, which makes shaving a breeze. I’ve always heard the key to shaving was a good razor, but after using this recipe I’m thinking the key is actually the shaving cream you use. Most shaving creams are harsh and clog up the razor, you also have to use a lot of it to cover your hair before you shave it. Then when you finish shaving you have to apply a lotion to your arms or legs and either aftershave or astringent/ toner to your face. I have noticed when I am finished shaving I actually do not have to apply lotion because this recipe is so nourishing to my skin. After continual use neither my husband or myself have had a single ingrown hair or clogged pore after shaving.
Notes:
Astringent and toner have always been confused and you will find it really depends on the person or company as to who calls it what. What are they? “Generally speaking, toners and astringents seek to do many things as sort of a skin care workhorse. They simultaneously try to soothe, close pores, disinfect, nourish, control oil, and mildly exfoliate dead skin cells” (1). Most astringents/ toners contain alcohol; alcohol can lead to overly dry skin which in turn makes your skin unbalanced. Your skin will try to make up for this by producing extra oil, which will leave you with oily skin.
-
- Rosemary Essential Oil- Rosemary is a natural toner which helps to tighten the skin and reduce the appearance of pores, it is a natural cleanser, it gets rid of acne and cellulite (for those of you who plan to shave your legs with this recipe this is just an added bonus), and it is extremely beneficial for restoring the hair growth cycle which will continue to be useful each time you shave.
-
Peppermint Essential Oil- Peppermint also has the deep cleansing and toning qualities. Peppermint oil is used to relieve skin irritation and itchiness while reducing redness.
- Peppermint and Rosemary are both well known for reducing head and neck tension, strengthening mental clarity, and improving mental function (which has nothing to do with shaving but these are qualities I couldn’t leave out).
-
Aloe Vera Gel, Coconut Oil, and Shea Butter create the perfect blend for thickness, smoothness, and when you add the baking soda you end up with a whipped cream consistency. All of these ingredients are useful for improving skin quality and healing any irritants (in this case the shaving).
-
Dr. Bronners Magic Soap- The first time I made this recipe I didn’t include the soap. However I added a small amount the second time I tried it and I was very impressed. The third and final time I altered the recipe I decided to add enough to create a slight lather so that I could wash away all of the dead skin/ shaved hair after shaving. The soap also helps to remove hair from the razor so that it doesn’t get clogged up while you are shaving.
For those of you that follow me on Facebook, I told you this recipe came with a hidden secret.
I have very sensitive scalp, too much conditioner will make my hair very oily, and certain shampoos will leave my scalp feeling sore and scabby. So after I made my own shampoo recipe I was thrilled because for the first time in many years my scalp and hair felt normal. I have been using my own recipe for shampoo for a while now, and every once in a while (change of seasons, too much sun, getting in a swimming pool with chlorine, etc) my hair will be a little dry. I quit using conventional conditioners because my shampoo recipe is usually moisturizing enough but there are times where a deep conditioning treatment helps. This shaving cream recipe is an amazing deep conditioner. When I decided to try it for this purpose I was skeptical about how it would work but I thought it was worth a try. Before I got into the shower I applied this cream to my scalp and worked it through my hair until about 50% of my hair was covered with it. I let it sit on my scalp and hair until I was done washing my body and washed it out of my hair with my normal shampoo. I honestly felt like I had just left the spa after using it and this combination of ingredients is perfect for conditioning, then rinsing away excess oils (with the Dr. Bronners and baking soda). So the big secret is that this shaving cream doubles as a deep conditioner for your hair. Earlier I mentioned that peppermint and rosemary essential oils are very beneficial for the growth cycle of hair, and as such these properties are also extremely beneficial in a deep conditioner. Let me know what you think if you try it this way!

Want the details on the ingredients I use? Email me: kayla@healing-salve.com
As always I hope you enjoyed this recipe, and I hope you will leave comments/ share this recipe if you really loved it! Let me know how you have altered the recipe for your personal needs or if you have found another great use for the recipe! Thanks for reading -Kayla
1: http://www.shaving101.com/index.php/education/mens-skincare/262-the-details-on-cleansing.html
Herbal First Aid Kit!
Sunday, October 13, 2013
As a child I remember my mother’s huge metal, red and white, first aid kit that hung on the wall in the kitchen. Inside you would find everything from medical tape to icepacks. I am pretty sure the herbal first aid kit would fit perfectly inside one of those if you still have one on the wall but if not and you want to keep all of your first aid supplies together use an old messenger bag or plastic container; you could also dedicate a single kitchen shelf to your first aid supplies so they are always on hand and your family knows where to find them. Unlike my mother’s first aid kit all of these remedies are 100% safe for children. If you need to use these on toddlers my only advice would be to administer a third of the recommended amount.
So without further delay, lets get started preparing our herbal first aid kits!
Sterile Items, no recipe required:
-cotton swaps, also known as q-tips.
-Band-Aids, or off brand version
-gauze pads
-medical tape
-small pair of scissors
For these items I personally use off brand products, with my natural Neosporin (healing salve) recipe I rarely use any of these items; but they are important to have on hand for extreme situations.
 Healing Salve:
-This recipe has to be the most used recipe I have made thus far. This ointment is so versatile it will actually cut out several products. When you have healing salve in your first aid kit you no longer need disinfectant, Neosporin, sun burn cream, burn cream, bug bite/ sting ointment, or rash cream. Healing salve will reduce a lot of first aid kit clutter and quickly become a favorite amongst your family, trust me!
This recipe includes lavender essential oil which is a natural disinfectant. Frankincense which heals old scars and prevents the formation of new ones. Tea tree (also known as Melaluca) essential oil among other healing properties relieves pain which can be very useful. For more information about why each ingredient in my healing salve recipe was chosen please check out this link, I have detailed information about each ingredient along with the recipe.
Two tips which can be helpful with the healing salve; first if you want a thinner consistency use less beeswax when making the recipe, second make sure to either wash your hands or grab a cotton swab to apply. I keep mine in a container with a lid that is easy to use, I can simply squeeze out the amount I need and close it without contaminating the entire jar.
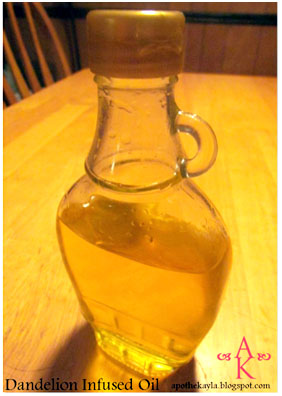
Muscle aches or sprains:
This recipe is very simple, only two ingredients are required. Dandelion infused oil (we call it “dandy oil”) has amazing healing properties. I use this anytime I have a muscle ache, sprain, and surprisingly any time a member of my family has a toothache (rub on the outside of the check where the pain is). As long as the dandelions in your yard have not been sprayed with any chemicals one of the ingredients will be free for you! You can use any type of carrier oil you like for this recipe (sunflower oil, extra-virgin olive oil, jojoba oil, etc) but the dandelion heads will need to infuse the oil for a few weeks so I like to stagger the production at our home. This is simple if you think about it, before you mow your lawn in the summer grab a cup or two of the bright yellow dandelion heads, when I plan it this way I have a fresh batch that I can pull off of the window sill every other week during the summer.
Natural Pepto-Bismol:
I don’t currently have this recipe on my website but I am willing to share it because it is so amazing, and simple. For this recipe you will need extra-virgin olive oil and rosemary essential oil. Mix 5 drops of rosemary essential oil with every tablespoon of extra-virgin olive oil and shake. Rosemary is beneficial to every part of our digestive tract, from our esophagus to the lining of our stomach, and colon care. I’m sure you have seen the pepto commercials nausea, heartburn, upset stomach, diarrhea… well a tiny rub of this mixture helps all of that plus gallstone pain*, constipation, gas, ulcers, acid reflux, and food poisoning. I keep my mixture in a glass bottle with a cork; I simply remove the cork, place my finger where the cork was, and shake the bottle. I use the oil that remains on my finger once I have shaken the bottle and no more. It works very fast and has been a miracle recipe in my home.
Natural Vicks:
Using coconut oil, 1 drop of peppermint essential oil, 2 drops of winter green essential oil, and 2 drops of eucalyptus you can make a natural version of menthol rub. Mix in a small jar and apply by hand to the chest. Applying a hot wash rag over the mixture will enhance the experience!
Want to know more? Follow me on Facebook, twitter, or instagram. Also email me if you have any questions!
Simple Odor Solution
Monday, September 23, 2013

If your home has a room (or rooms) that have a problem with odors; whether it be the bathroom, the kitchen, or the room with the litter box in it this two ingredient room deodorizer should help!
This recipe is so easy I will not have to make a recipe card for it.
What: baking soda and essential oils of choice
How: put the amount of baking soda you wish into the container of your choice and drop a few drops of your favorite essential oils or essential oil mixture.
When you notice the odors coming back simply shake the mixture, you can shake the mixture for at-least three months before you will need to replace it.
 Let me know in the comments section which mixture of oils you used. Remember that shaking the mixture will release more scent into the air but with all air fresheners if you live with them and smell them daily they wont smell as fragrant to you as they would to a visitor to your home.
This recipe is so easy I will not have to make a recipe card for it.
What: baking soda and essential oils of choice
How: put the amount of baking soda you wish into the container of your choice and drop a few drops of your favorite essential oils or essential oil mixture.
When you notice the odors coming back simply shake the mixture, you can shake the mixture for at-least three months before you will need to replace it.
You can find a glass jar with a slotted lid at any thrift store, or you can make your own using cheesecloth and a bit of twine. For that you will need a glass jar with a lip (a mason jar will work), cut a piece of cheese cloth to fit over the top and tie it on around the mouth of the jar. If you have a mason jar with the original lid you can simply cover with the cheesecloth and screw on lid without the inner plate.
Baking soda naturally wicks away odors, by adding your favorite essential oils you then replace the odor that the baking soda took away with your favorite scent.
The first time I made this air freshener I used only peppermint oil. It was nice but something I got tired of after a few days. The second time I used a mixture of lemon, wild orange, and lime. This mixture smelled like a bag of skittles and was delightful.
Many people use this recipe, from the farmers wife to the store owner it has been around and loved for many years. The first time I used the recipe was when my chicks were living in their brooder box in the basement; it definitely came in handy!
My favorite thing about this mixture is how simple it is and how simple it smells. I'm not sure if you have ever noticed the burning sensation in your nose that some candles, sprays, or fresheners give off, but you don't have to worry about that with this recipe.
Let me know in the comments section which mixture of oils you used. Remember that shaking the mixture will release more scent into the air but with all air fresheners if you live with them and smell them daily they wont smell as fragrant to you as they would to a visitor to your home.
Thanks for reading!
-Kayla
From my workspace to yours: Vol. 1
Saturday, September 14, 2013

One of the most used (and complained about) ingredients in my recipes is beeswax. While there are no complaints about all of the wonderful properties beeswax adds to the recipe, there are many about working with it. After I made my first recipe with beeswax I honestly shuddered at the thought of having to use beeswax again. Through trial and error I have learned a few tricks that make my life a lot easier. In this post I plan to share some of the tips I have learned along the way that makes it simpler for me to enjoy working with beeswax.
1. Beeswax cubes: In the photo above you can see my tiny beeswax pyramid and a container full of what look like beeswax ice cubes. The very first thing I noticed about working with beeswax was how hard it was to cut, and how many shavings fell on the floor while I was cutting it. Although I was being tedious about slicing it I made a big mess and had tiny slivers of beeswax everywhere.
My Solution: I became curious about pre-measured beeswax cubes, and wondered how much beeswax would fit in each space of an ice cube tray. To my surprise roughly one tablespoon; I figured this out first with water of course.
How to: In order to melt the beeswax you can either lay the whole block in your double broiler or melt it in your Crockpot (explained in #2). Then simply pour the beeswax into the ice cube tray and let it harden overnight. When it is ready bust the beeswax out the same way you would ice and store your cubes in an airtight container or bag.
2. Beeswax in my Crockpot?
While this idea may sound crazy, trust me! I couldn’t get over how cumbersome it was to quickly pour the exact measurement of beeswax I needed into the container I was using, or into a mixing bowl from the double broiler. Another complaint I had was how the double broiler either used all of the water very quickly or got a little too hot, too fast and the beeswax smelt a little burnt. The beeswax wouldn’t turn black or anything but the pleasant smell of beeswax became the smell of charred beeswax. Oh, and then I had three containers to clean with hardened beeswax on them…
My Solution: Before the beeswax cubes came the tiny Crockpot. You know the kind I’m talking about; usually they are used for warming candles or potpourri. You can buy one online (here), or if you would like the country themed (cheaper) version pick one up in a thrift store like I did (maybe you will get lucky and find one with ducks on it).
By allowing the beeswax to melt slowly you don’t have to worry about overcooking it or a big cumbersome pot. You can also let go of any worries about burning your hands because it doesn’t get as hot as your double broiler. The only negative thing I have noticed with this method is the time it takes to melt. So usually I turn on the tiny Crockpot, put the beeswax in it and get busy gathering the rest of my supplies and ingredients for the recipe. As the saying goes, a watched pot never boils!
How to: I believe you could also use either a mug warmer/ candle warmer it’s the same concept, but without sides (like this).
Once I found my Crockpot, I found a mason jar that would fit in it. Whether or not you decide to make the beeswax cubes it’s so much easier to be able to add the beeswax, and/ or coconut oil, Shea butter, etc. and then remove the mason jar from the Crockpot to add the final ingredients that do not require direct heat (such as the essential oils) before you pour your mixture into its final container(s).
If you are planning to make beeswax cubes of your own, using the tiny Crockpot method comes in handy. You have better control with your pouring and you do not need pot holders (please use your judgment here, test your melted jar of beeswax for temperature before picking it up, your Crockpot may get warmer than mine).
3.Freeze your beeswax!
Well to be honest I’m not sure if there are any benefits in freezing beeswax, but there is a huge difference in cleanup! When the recipe is finished and you have your nice new product before you, you also have the task of cleaning up the melted beeswax. Why should this be a chore?
My Solution: My mother taught me how to freeze candles to remove them from the container they are in so I could use the container for a different candle. When the candle is frozen it contracts and pulls away from the sides/ bottom of its holder. With beeswax you are working with the same concept.
How to: Place your dirty beeswax jar, into the freezer and leave to sit over night. When you go back to it in the morning you should be able to simply chip it away from the glass. Washing beeswax from a container is terrible, you end up spreading it everywhere and you have to wash the dish cloth before you can use it on anything else, ugh it’s just a mess. You can also use this method to get a product you have made out of a container if it includes beeswax, like lip-balm.
How to: While this method may be old news to some of you, if you don’t know about it already you will love this trick! For this trick you will need a clothes iron and a brown paper bag. Place the brown paper bag on your carpet where the beeswax or candle spill is then iron (on a low setting) over the brown bag. You will see the brown paper bag begin to wick the wax away from your carpet and it’s almost like magic!
I believe this sums up the beeswax tips, if you have any that I could use please leave them in the comments section below. If you would like to share this post feel free to do so, if it has helped you it will likely help someone you know! E-mail me with any other questions or concerns and as always thanks for reading!
-Kayla
Subscribe to:
Posts (Atom)


Social Icons