
Beginners guide to making soap.
Tuesday, October 28, 2014

I have been making my own health and beauty products for almost two years now and I always wanted to make my own soap, but I was afraid of working with Lye. My first tip in this post: Don't let Lye scare you away from making soap.
We have made two different batches now and while there is a science to it, there is also a special sequence of events needed to make the perfect apple pie.
 The rewards of making soap are many, and I knew I would love being able to customize my soap with different ingredients and textures but I was so afraid of the Lye. I had my bottle of Lye for at least four months before I attempted making soap. It sat high on the shelf mawking my fears... Okay so it wasn't that bad. We were busy and I knew making soap for the first time would require my full attention and a bit of research.
 I am by no means a soap making expert, I wanted to write this blog post though to share the information that helped me when making soap as a beginner.
The first thing you should do is read over this post. It tells you which tools you will need and has a step by step guide for the process. This post does recommend to open plenty of windows for proper ventilation when using Lye but we prefer to take it outside until the fumes die down.
Once you have a good grip on the tools and basic steps you can dive right in to the fun part: choosing ingredients!!
 You can use a plethora of ingredients in soap making but you have to start with a few basics. You will need to use a good base oil such as hemp, coconut, or extra virgin olive oil in any recipe you make. My preference of course is hemp and coconut oils but when we left North Carolina I left my hemp oil in my mother's refrigerator so we used coconut and extra virgin olive oil this time. In our first batch of soap we used hemp and coconut oil.
 I suggest using this calculator when choosing your base oils to ensure you get the right outcome. This calculator helps you figure out exactly how much Lye and water to use based off of the oils you choose.
You can choose to make a plain, unscented batch of soap and then grate it down later to melt and add scents or you can go all out and add dried herbs, exfoliates, essential oils, and colorants.
I forgot to take photos when we made our first batch of soap, but this time I took some throughout the entire process. For our first batch of soap I used only patchouli essential oil because I wanted to make sure I had the process down pat before I started adding the fun stuff! We wanted to make sure if there were any problems we could easily replicate the recipe and figure out what went wrong.

When I say we I mean my husband and myself. My husband has helped me both times and I strongly suggest having a friend help you as well. Its always nice to have an extra set of hands and someone who can help measure the temperatures when you get to that point.
This time when we made soap, after doing research, I decided to replace water with organic green tea (make sure it has reached room temperature before mixing with Lye). I also chose to add used coffee grounds as a light exfoliant and we used patchouli, ylang ylang, and clary sage essential oils.
One variability that we didn't account for was the temperature differences we go through on any given day while living in an RV. While our soap did set up in the end it took longer than normal and I'm guessing it may take a little longer to cure as well.
Yes, that's right we made soap while living in an RV so if we can do it in our tiny-home you can too!
This is the exact recipe we used:
6 oz Extra Virgin Olive Oil
5 oz Coconut Oil
3.7 oz Green tea
1.7 Lye
20 drops Patchouli
3 drops Clary Sage
3 drops Ylang Ylang
1 teaspoon Vitamin E Oil
1/2 Cup used coffee grounds

When choosing essential oils for soap I like to look at their properties before I decide on the scents that I like. That may seem a little backwards but the physical, mental, and emotional benefits of the soap are amazing in the long run.
Once I chose the oils for their properties I took care to blend them properly and make sure I would like the scent. When blending oils you should not just add 10 drops of each oil, you need to blend them in a precise manor.
For essential oil reference I suggest these books: Modern Essentials and Emotions & Essential oils. Modern Essentials is my essential oil bible and I was just recently introduced to the Emotions & Essential Oils book, I love it already.
The soap we made from the recipe above has the physical benefits of healthy cell growth, balance of skin and scalp (helps with healing skin including wrinkles, stretch marks, and dandruff on the scalp), soothes nervous tension, and hormonal balance (men and women).
Along with the physical benefits of the essential oils in this blend there are emotional benefits as well.
Patchouli "supports individuals in becoming fully present in their physical body... patchouli brings confidence in the body, as well as grace, poise and physical strength" (1).
Ylang Ylang is the oil of the inner child. Emotions & Essential Oils says: "Ylang Ylang reconnects an individual with the child self and the pure, simple ways of the heart... this oils allows emotional healing to flow naturally, nurturing the heart through the process" (1).
According to that book Clary Sage "assists in opening creative channels and clearing creative blocks. It eliminates distractions from the mind and assists individuals in finding a state of emptiness where creative forces may be realized" (1).
So... if you are thinking about creating a home made product that can help to restore your mind and body soap should be at the top of your list. Again, there is a science to it and you should make sure you plan research time and adequate prep time.
Making soap on your own is very rewarding and a useful way to be creative. Let me know in the comments below if you have made soap before and which ingredients you like to use!
Looking for essential oils? Send me an email, I can give you all the details!
Thanks for reading and stay tuned for my DIY pH perfect shampoo!
Sources:
1:Emotions & Essential Oils (Second ed.). (2013). American Fork, Utah: Enlighten.
Essential oil diffuser necklace
Wednesday, September 24, 2014


Diffuser charms are very interesting but simple to make.
When you wear the Terracotta against your skin and your body heats up the clay, it diffuses the scent of the essential oil into the air.
Terracotta sculpting clay is extremely inexpensive and easy to work with.
The first thing you have to do when working with the terracotta clay is to warm it up by squeezing it in your hands like a stress ball. Then when the clay is easily mold-able you will lay it out on an old cookie sheet.
Use cookie cutters or an X-acto knife to cut the shape you plan to work with.Then use a small straw or instrument to make the hole at the top, where you will later place the string.
Here is the fun part, the design! You can use rubber stamps, the x-acto knife, a regular pencil with

You can press tiny shells or crystals into your charm as well!
Pre-heat your oven to 275 degrees. Then place the cookie sheet you used to make the charms into the oven for 3 minutes. *Please keep a close eye on your charms to ensure they do not burn*
From my experience you may want to use bake a test charm. Make sure the thickness of the charms you are not testing are the same size as the test charm and you should be good!
Once your charms are out of the oven give them a few minutes to cool, pop them off of the tray, and add your hemp cord or string to turn it into a necklace!
Drop one drop of your favorite essential oil onto the grooves of the charm. Allow the oils to soak into the clay for a few minutes.
Then all you have to do is wear it and bask in your cleverness and aromatherapy all day!
Setting up your space.
Thursday, September 18, 2014


When you begin the switch to all holistic products, and you plan to create your own having all of your tools, ingredients, and containers in one place makes a huge difference.
At our last house my wonderful husband built me a custom desk with little nooks and crannies for ingredients and tools. I also had an Italian built cabinet that displayed my collection of tiny vintage bottles.
Since we are moving into our camper over the next two weeks I have had to really consider the space I will have to store my apothecary goods. I have narrowed my bottles/ containers down to a small box.
 |
| A photo of my old desk |
While I may not have a lot of space I feel it is very important to keep all of these items organized because when I need to find the ingredients for my all natural stomach soother in the middle of the night I don't want to have to dig through every cabinet.
There are also times when I have friends or family around and I am so excited to share holistic remedies with them that I find out what ailment I can provide a remedy for and head straight to my apothecary station.
In my book, the first thing I recommend is to set up your space. I also give a complete list of the tools I like to keep on hand and suggestions for setting up your own space.
I wanted to talk specifically about organization though.
When you begin thinking of a place you plan to keep your apothecary station think of a temperate location that is out of direct sunlight. Exposure to sunlight will decrease the shelf life of natural ingredients and essential oils.
If you have small children or pets you will want to keep your items out of reach, or inside of cabinets if you have cats like we do!
 |
| My vintage bottle collection, at our last house. |
I asked my awesome husband to install bookshelf's on my desk for reference books, this really came in handy.
I also have office supplies on hand for labeling purposes; like labels, stickers, and permanent markers.
A spare notepad comes in handy when you are experimenting with a new recipe and want to write it down in-case it is a winner!
When you have a home for every item you will be more likely to return that item to its home so that you and your family (if they are allowed to use your space without supervision) will know where to find the goods!
I can't wait to share my new apothecary space with you all. It will be tiny, but it will also be efficient. I will make sure of that.
Do you have a personal apothecary space? Share it with me on my facebook page I would love to see it!
Thanks for reading and let me know your favorite organization tips in the comments section. I may just use one of them in my new space! -Kayla
Enhance your tan safely
Thursday, July 3, 2014
.png)
I highly advise the use of an all natural sun screen, and yes you will get a tan through the sunscreen. So be "sun-smart". Exfoliate in the shower,
slather on sunscreen, and limit your time of exposure.
.png)
This recipe is the same as my all natural sugar scrub, but this specific recipe is sun safe!
You will want to avoid using any citrus oils during the summer on your skin, specifically if you use the oil in a spot that gets a lot of sun; i.e. face, arms, legs.
The recipe is:
-1 cup of Raw sugar
-1/4 cup of carrier oil*
-5 drops of therapeutic Lavender essential oil.
-Mix together in the container of your choice & use!
I used Lavender in this recipe because Lavender is soothing, healing, and protective.
If you want to avoid the pesky skin fungus so many people get in the summer Lavender will help that too because of it's anti-fungal properties!
*for the carrier oil, naturally I prefer Hemp Oil. You can use sunflower oil, extra virgin olive oil, or fractionated coconut oil.
"Wait one second.. why should I care about exfoliation?"
Good question!!
Exfoliation helps to break away the old dead skin on your body, exposing healthy skin and helping to maintain the balance of your skin cycle: & yes there is such a thing!!
Exfoliation is great before going into the sun because your skin is able to evenly absorb the sun rays, and does so more quickly.
***Which means you don't have to get a sunburn to prove you enjoyed your Summer!***
Let me know what you think about this recipe in the comments section below!
Thanks for reading, make sure to stay safe in the sun and remember Sharing is Caring! Share this post with those you love!
What to pack in your toiletries bag for a vacation.
Monday, June 23, 2014

You never know which oil you will need but if you know your families health well enough you can plan ahead and pack for things that you, your husband, or your kids experience often (such as heartburn, nausea, sunburn, headaches, etc). Each family will be different because we all have different needs.
This is the list I made:
Single Oils: Eucalyptus Oil, Wintergreen Oil, & Peppermint Oil (email me to find out where I buy my oils).
Oil Blends: Stomach Soother (Includes Peppermint, Lemon, and Rosemary) which works wonders for nausea, upset stomach, diarrhea, constipation, acid reflux, and helps my husband if he has a gallstone attack (literally stops the attack from happening).
I also carry: Healing Salve, Dandy Oil, Hemp lippie, and mineral makeup(for a light sunscreen on my face and because I love it)!

Believe it or not all of these items fit in a very small space. I want to continue making conscious choices while we travel as well as at home. Last summer I forgot to bring any oils and we had to leave the family trip early to come home to get my oils... not fun.
I could also condense these items down into travel sized containers, but for the most part I make small batches of everything to ensure it doesn't spoil (no problems with that so far).
I guess I should quit blogging and start packing, I may not have internet access so if I'm quiet for a few days you know why!
Thanks for reading, remember.. "Sharing is Caring"!
The fortress was cracked open.
Wednesday, June 18, 2014

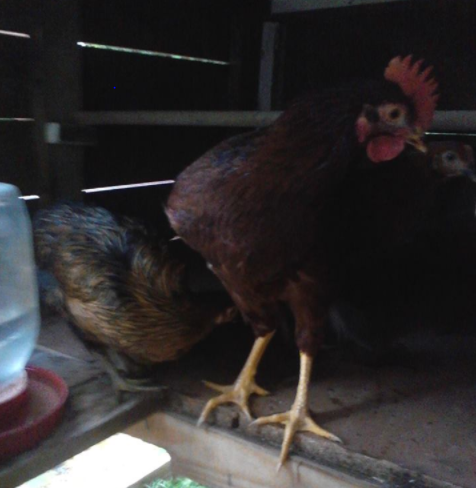
As I am sure our readers are well aware that the Winter's are about to pack up the Winter Stead and hit the road. We hope to find ourselves in some type of mobile something or other (RV). We know it might be a pain to travel with two cats but they are coming with us. Our chickens though are not so lucky, we can not travel with them.
So today I am going to share the recipe we used to fry them up... Just kidding!!
We found them a home. They are with Kayla’s cousin who has a large piece of land and plenty of other chickens for them to play with. I know that sounds like something you tell the kids when their pet dies but really we did not eat the chickens.
At first I thought I would be just fine, they are after all just chickens. But when the time came we were all a little sad to see them go. And though I know that they are just chickens I think they were sad to go too.
I had the hardest time getting them out of their coop. You see when they were just little yellow bitties we handled them a lot. Little Lou had a wonky foot so we had to wrap her foot every day to try and turn it the right way around. I do not know if it helped but after a while it looked better and she was able to get around all right, so I am glad we tried.
In the beginning we kept them inside the basement and would let them outside on nice days. But we lived surrounded by woods with all types of animals that would eat our chickens and a fortress needed to be built.
Once we put them up in their fortress it was their home. They did not come out after that and they were not accustom to being handled any more. It was not all bad that they were stuck in their home. It was a nice home. I have never built a chicken coop before but I know how to cut a board and swing a hammer so we got to building.
Well we tried to. It was hard as we had no money.
Luckily we had friends and family. Kayla’s aunt and uncle had a lot of used wood in their yard so we went hunting. It was all a bit old some from an old restaurant some from an old house and some leftovers from when the sawmill was up and running. Though no two pieces were the same we had all we needed to build our chicken fortress. So for the next few days I pieced together my reclaimed parts and made my chickens a home.
It was small, not too small for our four chickens but small. It was solid, I had climbed all over that thing before I had finished it. It was not pretty but we had some old, barn red paint left over from a job we had done not long ago. Nothing was getting in there, not even the dog next door who would try any time she got lose.
It was a good home and they did not want to leave it. So I had to tear it down. The outside pen that was attached to the coop that I had wrapped in hardware mesh had to be ripped open. As I undid the seam I had sewn in the mesh I thought of the blood I had spilled when had I first sewn it. When I went for them though they ran from me in to the safety of their fortress.
We thought we had a good idea, we would wait 'till after dark when they went to roost and pull them out then. So we waited for the night and when it came we went to grab the birds. Normally they are heavy sleepers not tonight though, they heard me coming and they ran. As small as the coop was I could not just reach inside and grab them. The thing was made to keep things out and that meant me as well. So the only thing I could do was rip the roof off.
I remembered how heavy the shingles were when I had to carry them around the house the first time, and that was not just a plywood roof either... that would have been too easy. All I had left after the walls and floor was some heavy old 2x6. I mean old like when a 2x6 was really 2x6.
So I squatted low next to the overhang and with a grunt I shot up. It creaked and popped in protest but it gave. I stood over the chicken coop like some kind of giant. The birds hid in the corner like frightened, well.. chickens. One by one I plucked them up from the once safe coop and placed them in their cages for transport.
Then they were gone. The birds we had raised from little yellow tufts of fur. Who gave me fresh eggs for breakfast even through the cold winter months. Who I feed and watered every day. The birds I had cursed with every crowing come the dawn. The coop, their once impenetrable fortress, sat cracked open like one of the many eggs we collected from the comfortable nesting boxes.
It was part madness part inexperience and it looked like it. When I built it I stood as proud as a new father standing above his new born babe. Now my triumph looks like the day after the storm. The sunrise came today without pomp and fanfare. I slept till noon and when I jumped from bed and thought I had slept through my alarm I ran to the box were the chicken feed once was. Then I remembered that I had not slept through my alarm... but that my alarm was gone.
Natural kidney pain relief.
Tuesday, June 17, 2014
I couldn't believe that I had never heard of this simple solution before.
Mix two drops of Eucalyptus oil with one teaspoon of carrier oil and rub directly on your side over your kidney.
Within seconds you will feel relief.
I also keep a small vial of this mixture with me when I go out and about, just in case I begin to feel the pain and want to carry on with my day as planned.
If you have ever had kidney stones you know that the pain is intense and even after the pain has stopped you remain sore for a few days. Trust me... this mixture works!
Why does Eucalyptus work?
Eucalyptus is a natural discomfort reliever and reduces irritation.This combination works wonders for kidney stone pain. If you don't believe me try it for yourself!
Want to know where I get mine? Email me: kayla@apothekayla.com
Have essential oils helped you in ways you could never imagine possible? Let me know in the comments section below!
Thanks for reading and be well!
How a tornado saved my life.
Wednesday, June 4, 2014


Two months before our wedding, on March 28th 2010, an EF3 tornado ripped down our street. Luckily we made it out alright, but I would never know that in the fifteen seconds it took for this storm to condemn our home my life would change forever.
Sunday, March 28th 2010 started out like any normal day. At this time in my life I only checked the weather when we were going to be outside for the day or I would catch it while Robert was getting ready for work. While we were eating dinner that night, a fierce thunderstorm came up. We had employed a new Sunday tradition where we would eat dinner at the table without television, and because I didn't think to look at the weather forecast we had absolutely no warning what-so-ever...
After dinner, while the storm was still raging outside I went upstairs to set up a family card game and the power went out. Immediately I heard what sounded like a train and starting yelling: "TORNADO.. GET IN THE BATHROOM, GET IN THE BATHROOM". My family made it to the bathroom under the stairs just in the nick of time and for at-least 15 seconds while the tornado was coming down our street directly towards our home we heard the loudest noise I've ever heard in my entire life.
The scariest part about the entire tornado was the unexpected. Once the violent noise ceased we didn't know what we would find when we opened the bathroom door. Because the uproar was so loud it literally sounded like part of our house was being ripped off.
We did come out of it alive, and to our surprise the tornado that was headed towards our home like a magnet made a b-line around our home and continued through our backyard. In the video below, which I found online a few months after the tornado, at 1:05 you see transformers blow, those were in our neighborhood.
You cannot tell by looking at the "tornado damage" photo but every single glass pane was broken, the back side of our garage was blown off, my mothers car (sitting in the top photo on the left side with the blue tarp over it) had been picked up by the tornado and spun around. The trees on the roof fell directly into our teenaged sons room and water immediately began seeping into the walls of our home (which eventually led to black mold).
 |
| click photo to enlarge |
We moved from this home into a hotel room that our home owners insurance paid for and because the contractors moved so slowly we ended up living in that hotel for two months (up until the week before our wedding).
Little did I know the worst was yet to come. While the tornado only lasted for 15 seconds my life would continue to be in turmoil.
I didn't realize that tornadoes could form inside of any super-cell thunderstorm if the conditions were right and I had also never heard of a tornado in North Carolina, I thought tornadoes only happened in tornado alley...
I thought that it was my fault, because I didn't check the weather channel that morning, and every one we spoke to about it said "your area was under a tornado watch all day, didn't you realize"?
So, I found a weather radar app on my phone and quickly became obsessed with checking it everyday. This obsession turned ugly very quickly and to make a long story short within the next year I came to a point where I was checking the radar on my phone every 5
 |
| This radar image was from the night of 3/28/10 |
I should probably back up, and give you a little bit of back-story.
When I was fourteen and after months of trying the doctors couldn't figure out what was wrong with me (I was having severe attacks in my upper stomach) my doctor said: "she is just depressed, and wants to get out of going to school.. let's get her started on some anti-depressants".
I started the medication, and months later found out that I had gallstones... I continued taking the medication and was still on it when the storm hit.
So.. back to the present, I've now been on anti-depressants for eight years and was displaying signs of bi-polar disorder, and now the doctors are giving me extremely high doses of anti-anxiety medications that made me fall asleep behind the wheel and created a zombie version of myself. They treated me like a guinea pig and tried every possible medication prescribed for PTSD.
When the medicine didn't help, and my husband was at his wits end with me (because of the PTSD and OCD about any type of precipitation) we had a long talk and decided that I should try living without the medications. My doctor was infuriated at this choice that I made for myself, he said if I quit taking the pills he would refuse to see me.
I was on medication that I had to be weaned off of, I had family members who tried to quit taking the same medication (Effexor) cold turkey and had mini-strokes so I knew if I was going to come off of the meds it would have to be done properly. I told the doctor if he didn't help me wean off of the meds, I would sue him when I had a stroke.. so he helped me.
It took almost a year to completely wean off of the medications and even after I had taken my last pill it took months for the fog to wear off. Today I have been anti-psychotic medication free for over two years and I display no signs of depression, bi-polar, or PTSD. (Yes this is the short version of the story) ;) I can also dance in the rain again without worrying that a tornado would pick me up and carry me to Oz...
This tornado helped me learn that not every problem can be fixed with a pill and I also learned that when we make plans of our own mother nature has a way of putting our plans in perspective.
This tornado saved my life because like a great skin cleanser it brought my true problems to the surface and I had to deal with them. It brought my husband and myself closer together than we ever imagined two people could be because we had to work through our problem, even when his family tried to convince him to divorce me, and we learned that if we could make it through this storm... our relationship could survive anything.
If you have read this far I want to say thanks for bearing with me, this was a really long post but I wanted to share this part of my story.
Thanks for reading & remember to trust yourself. Your intuition is stronger than you think!
**Update 02/18/2018: I have now been anti-psychotic medication free for six years. While the medication did not work for me, because I misdiagnosed with depression, that does not mean you should stop taking your prescriptions. Learn to listen to your body and if you believe that your depression stems from a physical condition seek help.NEVER try to come off of anti-psychotic medications without doctors supervision. This is a personal recounting of my story. This is what worked for me. Period.***
DIY Rose Hydrosol
Friday, May 23, 2014
.png)
Over on the Facebook page I asked you:
Post by Apothekayla.
This recipe is simple, yet amazing! There are other, more complicated methods of making this hydrosol (aka: flower water).
- You will need several roses, from a garden that does not use chemicals.
- A strainer or infuser.
- Large bowl.
- Pot for boiling water
- Glass jar for storing your hydrosol.
-Place rose petals (petals only) in your infuser or strainer, place in your large bowl.
-Boil water, carefully pour boiling water over the rose petals in your strainer/ infuser.
-Allow the rose petals to remain in your strainer/ infuser in the water as it cools.
-Press excess water out of the petals as you remove the strainer/ infuser from the water.
-Press excess water out of the petals as you remove the strainer/ infuser from the water.
-Let cool to room temperature, then pour into glass jar for storage.
-Let your hydrosol cool completely before using.
I will be back next week with a few smart ways to use hydrosol. Until then let me know what you think about this simple recipe in the comments section below or recommend a way for me to use it!
All natural bath soak
Saturday, May 10, 2014

Don't worry you are not the only one who forgot to get your mum something... do you want an easy, cheap, but luxurious fix?
For this recipe you will need three things.
- 2 cups of Epsom Salt
- Peppermint Essential oil (or the essential oil your mom will enjoy the best)
- A jar/ container

- Add Epsom Salt to container of choice
- Drop in 15-20 drops of the essential oil you choose
- Place lid on container
- Shake to mix
If you are looking for a few more easy gifts to pair together try these
I hope all of you lovely Mother's out there have an amazing day with your children. My mom wanted family portraits made for her Mother's Day.. so I guess I'll be saying "cheese" all afternoon!
Do you know of any quick home made gifts that mom would love? Let me know in the comments section below & Thanks for reading!
Cinnamon and Honey: Does it work?
Tuesday, May 6, 2014

 First of all, don't you love my tiny glass bowl in the photos! =D
Back to the topic at hand: I noticed Sunday night that I had a cold coming on, when I had to take a nap between going to IKEA and watching Game of Thrones I knew something was wrong.
The good news is that I have been relatively healthy since I started my all natural journey; with the exception of the occasional kidney stone giving me trouble and one bladder infection I have not been sick since December of 2012.
When I felt this cold coming on I knew what to do immediately and I ran.. slumped rather.. into the kitchen and mixed up this age old remedy.
Yes, I was hit hard with this cold and spent most of the day Monday in the bed. I continued to take the cinnamon and honey 3x a day and now, on Tuesday, I have enough energy to work, take photos & blog about my cold, and catch up on all that I have missed while being sick on Monday.
I'm still taking the mixture of Honey and Cinnamon and I will continue to do so until all symptoms have passed but I can assure you that I've never gotten over a cold this quickly.
Do you use Honey and Cinnamon when you have colds? What else do you use this mixture for? Let me know in the comments section below!
Don't forget to enter the giveaway for a chance to win a copy of my book (giveaway ends 5/9/2014).
Remember: "Sharing is Caring" use the tiny social media buttons below to share this info with your friends!
Thanks for reading! -Kayla
**Update 02/18/2018: While I fully believe in the power of honey and cinnamon I would strongly suggest that you visit your doctor for a diagnosis when you are feeling symptoms of a cold. It could be a cold, it could be something else. I would hate for you to think that you have a cold and actually have bronchitis!**
All about Activated Charcoal
Thursday, April 24, 2014


Hello wonderful reader! I would love to introduce you to my dear friend Activated Charcoal!
This is not the same thing that you use on your grill. It is carbon that has been activated to increase its adsorption.
Adsorption, to explain simply, is the process of one substance attracting/ catching another substance (in this case a toxin) to remove it from a given surface.
Typically Activated Charcoal is used for dietary purposes as a laxative or aid for food poisoning. It is great to have on hand and you can even put it on snake bites to pull out the poison.
How I use it:
When I began my natural journey I threw away all of my makeup. I used to love eyeliner and mascara.. but I gave it all up in the name of a toxic free, all new me!
For eyeliner I carefully open one of the capsules and store it in a small plastic container. I lightly wet the end of an eyeliner brush and apply. Activated charcoal works great as eyeliner and comes off easily as well.
Mascara.. ah the fights I have fought with myself over the perfect mascara recipe.. after many wasted attempts, where I end up with more on my cheeks than my eyelashes, I have finally won the battle! :)
I only make this recipe in tiny amounts because now that I have gotten used to life without make up I rarely wear it. So when I have an occasion where I want to wear mascara I mix:
1 part bentonite clay, 1 part activated charcoal, 1 part vegetable glycerin & mix. Because I use tiny amounts at a time 1 part is equal to one capsule of activated charcoal.
Beauty Mask: This is super simple, and effective. Activated charcoal works wonders for purifying your skin. This mask may look scary but it really pulls out the bacteria and toxins hiding in your pores and makes your skin smooth.
Mix 1 capsule of activated charcoal with 1/8 cup of rose water, or regular water.. your call. Apply to your face, leave for 3-5 minutes and wash off.
Oral Hygiene: Many bloggers have talked about how well activated charcoal works as an all natural teeth whitener.(The picture above is for added entertainment, and because I'm cool like that!)
I had to try it, and now I'm hooked!
It's simple too; just open a capsule, wet your toothbrush, dip your toothbrush in the activated charcoal powder and brush your teeth. I like to leave the activated charcoal in my mouth for a minute or two and swish it around before I spit it out. Then brush your teeth as normal. Hopefully with hemp-paste! ;) I use this method once every two weeks or so. If I have an event or night out planned I will use it before I leave the house that day.
Tips for using activated charcoal:
First, it will make a mess if you buy it in the capsule form and open a new capsule each time. Why do I use the capsules then? Let's just say I've cried over my fair share of spilled ingredients/ makeup before and I would rather have a little mess than a dustpan full of it!
The solution here is simple, lay out a paper towel and try to bust open the end, don't pull the capsule apart just bust one of the ends. If you have any small jars laying around or even a plastic bag/ container (pill sized) you can bust open a few capsules at a time and store the rest for later use.
Also, this has nothing to do with health or beauty but... when I used activated charcoal on my teeth for the first time I made a HUGE mess in our white porcelain sink in the bathroom. Instead of freaking out I just sprinkled a little baking soda on a scrub brush and used the mess to my advantage! The activated charcoal made our old white sink sparkle like new. Hey.. if it will remove stains from my teeth why wouldn't it work on my sink right? I don't advise using it on furniture or your floors, I am only sharing this cleaning tip so that you don't freak out if you get it everywhere! ;)
I buy my activated charcoal from Vitacost, click the image to the right for more info!
Thanks for reading! Sign up for e-mail alerts to stay up to date with my latest posts or join me on my social networking accounts! (find the links on the top left near my photo) =)
p.s. Don't forget to leave a review on Amazon if you buy a copy of my book! I want to hear from you all and see what you think! Thank you all for the support! <3
D.I.Y. Hairspray
Thursday, April 10, 2014

A super simple recipe that works without making your hair feel crunchy..
Well.. as it turns out Raw Sugar, water, and grapefruit essential oil are the ingredients for an awesome all natural hairspray recipe!!
The trick is in how you mix these ingredients!
To start out you will take a small sauce pan and boil 2 parts water with 1 part raw sugar. Once the sugar has dissolved you will remove the mixture from the heat and add in your favorite essential oil. Add to the container of your choice, I use the small brown one pictured in the photo above because it has a fine mist atomizer, which ensures even coverage.
This hairspray is the perfect blend, I am amazed at how well it works! It does not leave your hair feeling sticky or crunchy, it simply holds.
I hope to investigate the world of all natural hair dye at some point. I am proud to say that after 14 years of continual abuse to my scalp I quit coloring my hair cold turkey over a year ago. =)
As far as the essential oil goes I use grapefruit essential oil because the scent reminds me of summer! Usually I choose an essential oil such as rosemary or peppermint when it comes to my all natural hair care routine, however since I bought this grapefruit essential oil from Eden's garden I can't get enough of how awesome it smells!
If you are interested in my complete haircare routine you can read more about that in my brand new book! Apothekayla Year One =)
Thanks for reading, please let me know what you think about this recipe in the comments section below!
Don't want to miss a post? Sign up for e-mail alerts in the left sidebar of this page.
Hemp Paste
Friday, March 28, 2014


So.. with the anticipation of the release of my book I wanted to share one of the recipes in it with you!
I've been using the Re-mineralizing toothpaste recipe for some time, and I can truly say that it works. Small cracks/ cavities in mine and my husbands teeth have literally vanished.
However, this recipe does taste a little bitter and because I love Hemp Oil so much and the makeup of Hemp is ideal for perfect human health I decided to make, try out, and share my review of a toothpaste made with Hemp oil!
Hemp Paste is perfect for the kiddo's, because it does taste better and doesn't have the tingly sensation; my little brother chooses it over the Re-mineralizing toothpaste. He uses it everyday!
Ingredients:
- ½ cup of Coconut Oil
- 1/8 cup of Hemp Oil
- 1 Tablespoon Baking Soda
- 15-20 drops of Peppermint Essential Oil
Directions:
- Mash the baking soda into the coconut oil with a fork or whisk.
- Stir in Hemp Oil & Peppermint Essential Oil
- Place in container with small spoon or BPA free plastic squeeze bottle.
Notes:
· Around our house we refer to this toothpaste recipe as “Hemp-Paste,” & yes it will be green. However it will not stain your teeth at all.
· The nutrients in hemp oil are perfect for balanced oral health. The blend of Omega 3, Omega 6, antioxidants, and fatty acids are wonderful for healing damaged teeth and allowing them to naturally heal. Hemp is also anti-microbial and anti-bacterial.
· Peppermint oil is also a wonderful ingredient for overall oral hygiene. Peppermint oil kills bacteria, helps to reduce plaque, and keeps your breath smelling minty fresh. If you are not a fan of peppermint toothpaste you can replace this ingredient with sweet orange essential oil or another oil of your choosing.
· Baking soda is an excellent semi-abrasive ingredient which helps remove plaque and prevent gingivitis. If you prefer to leave the baking soda out, the option is yours. However, baking soda is also great for neutralizing your pH levels which is a huge benefit for your teeth and your overall health.
· My teeth feel amazingly clean, as if I have just left the dentist’s office, and they feel so smooth and strong. They have gotten significantly whiter and brighter!
Non toxic cleaning products
Friday, March 21, 2014
 Clean it up; with simple ingredients found here:
At the beginning of this year (2014) I ran a small challenge to help motivate you.. *cough* me.. to get rid of toxic products and find alternative recipes.
These recipes are SUPER simple, most only include a few ingredients.I am a beginner at all of this; and with a little help from a few of my blogger friends and a few age old recipes I have successfully been able to transform this area of my life. ... Let me tell you, this was an area I had been avoiding. But why?!? There are so many positive aspects to making your own cleaning products: - You can craft non-toxic recipes in your home
- You probably already have the ingredients
- You can totally customize the scent
- You can take small steps by figuring out which recipes you actually need based off of the products you have been using and replace them.. as you go!
- Week 1 | Cleaning with Vinegar.
- Week 2 | Simple Baking Soda Recipes.
- Week 3 | This is a mess that calls for some serious soap.


Love Potion
Monday, March 10, 2014


To be honest when I first came up with this perfume I was mixing this blend because these are some of my favorite scents. I had no idea that they were so healing and romantically intense!
This spray smells amazing, and you can spray it on your pulse points (neck or the back of your wrist for example) or you can spray it onto your pillows to enhance the "mood" in the bedroom!
The blend is super simple:
Fill your container with witch hazel. Then add 20 drops of Rosemary Essential oil, 15 drops of Ylang-ylang Essential oil, and 10 drops of Patchoulli Essential oil.This is the blend I use, you can adjust the ratio a little or add in 10 Drops of Clary Sage to change up the scent.
You can wear this as your daily perfume if you like, just because you spritz your wrist does not mean you will have men falling over you at the market.. The best part about this mixture is that it will smell different on each person that applies it.
The essential oils in this mixture work on the aromatherapy level to sooth any emotional tension you have around "love"; whether it is self love, or frustrations in relationships.
If you want to know more about raising your libido and how aphrodisiacs work check out this article.
Subscribe to:
Posts (Atom)


Social Icons