
Herbal First Aid Kit!
Sunday, October 13, 2013
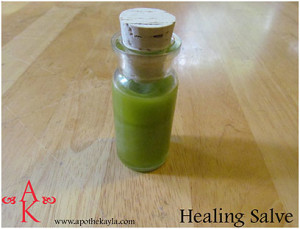
As a child I remember my mother’s huge metal, red and white, first aid kit that hung on the wall in the kitchen. Inside you would find everything from medical tape to icepacks. I am pretty sure the herbal first aid kit would fit perfectly inside one of those if you still have one on the wall but if not and you want to keep all of your first aid supplies together use an old messenger bag or plastic container; you could also dedicate a single kitchen shelf to your first aid supplies so they are always on hand and your family knows where to find them. Unlike my mother’s first aid kit all of these remedies are 100% safe for children. If you need to use these on toddlers my only advice would be to administer a third of the recommended amount.
So without further delay, lets get started preparing our herbal first aid kits!
Sterile Items, no recipe required:
-cotton swaps, also known as q-tips.
-Band-Aids, or off brand version
-gauze pads
-medical tape
-small pair of scissors
For these items I personally use off brand products, with my natural Neosporin (healing salve) recipe I rarely use any of these items; but they are important to have on hand for extreme situations.
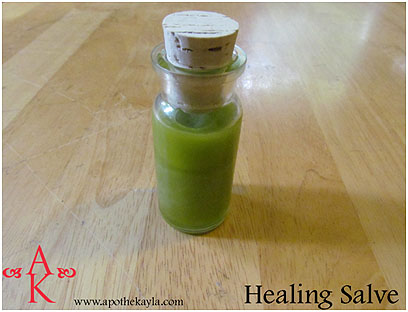 Healing Salve:
-This recipe has to be the most used recipe I have made thus far. This ointment is so versatile it will actually cut out several products. When you have healing salve in your first aid kit you no longer need disinfectant, Neosporin, sun burn cream, burn cream, bug bite/ sting ointment, or rash cream. Healing salve will reduce a lot of first aid kit clutter and quickly become a favorite amongst your family, trust me!
This recipe includes lavender essential oil which is a natural disinfectant. Frankincense which heals old scars and prevents the formation of new ones. Tea tree (also known as Melaluca) essential oil among other healing properties relieves pain which can be very useful. For more information about why each ingredient in my healing salve recipe was chosen please check out this link, I have detailed information about each ingredient along with the recipe.
Two tips which can be helpful with the healing salve; first if you want a thinner consistency use less beeswax when making the recipe, second make sure to either wash your hands or grab a cotton swab to apply. I keep mine in a container with a lid that is easy to use, I can simply squeeze out the amount I need and close it without contaminating the entire jar.
Muscle aches or sprains:
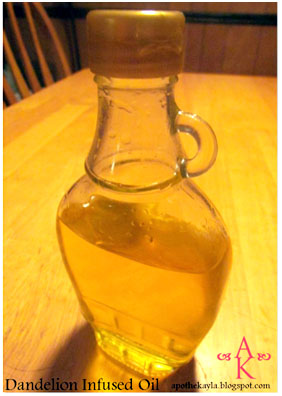
This recipe is very simple, only two ingredients are required. Dandelion infused oil (we call it “dandy oil”) has amazing healing properties. I use this anytime I have a muscle ache, sprain, and surprisingly any time a member of my family has a toothache (rub on the outside of the check where the pain is). As long as the dandelions in your yard have not been sprayed with any chemicals one of the ingredients will be free for you! You can use any type of carrier oil you like for this recipe (sunflower oil, extra-virgin olive oil, jojoba oil, etc) but the dandelion heads will need to infuse the oil for a few weeks so I like to stagger the production at our home. This is simple if you think about it, before you mow your lawn in the summer grab a cup or two of the bright yellow dandelion heads, when I plan it this way I have a fresh batch that I can pull off of the window sill every other week during the summer.
Natural Pepto-Bismol:
I don’t currently have this recipe on my website but I am willing to share it because it is so amazing, and simple. For this recipe you will need extra-virgin olive oil and rosemary essential oil. Mix 5 drops of rosemary essential oil with every tablespoon of extra-virgin olive oil and shake. Rosemary is beneficial to every part of our digestive tract, from our esophagus to the lining of our stomach, and colon care. I’m sure you have seen the pepto commercials nausea, heartburn, upset stomach, diarrhea… well a tiny rub of this mixture helps all of that plus gallstone pain*, constipation, gas, ulcers, acid reflux, and food poisoning. I keep my mixture in a glass bottle with a cork; I simply remove the cork, place my finger where the cork was, and shake the bottle. I use the oil that remains on my finger once I have shaken the bottle and no more. It works very fast and has been a miracle recipe in my home.
Natural Vicks:
Using coconut oil, 1 drop of peppermint essential oil, 2 drops of winter green essential oil, and 2 drops of eucalyptus you can make a natural version of menthol rub. Mix in a small jar and apply by hand to the chest. Applying a hot wash rag over the mixture will enhance the experience!
Want to know more? Follow me on Facebook, twitter, or instagram. Also email me if you have any questions!
Simple Odor Solution
Monday, September 23, 2013

If your home has a room (or rooms) that have a problem with odors; whether it be the bathroom, the kitchen, or the room with the litter box in it this two ingredient room deodorizer should help!
This recipe is so easy I will not have to make a recipe card for it.
What: baking soda and essential oils of choice
How: put the amount of baking soda you wish into the container of your choice and drop a few drops of your favorite essential oils or essential oil mixture.
When you notice the odors coming back simply shake the mixture, you can shake the mixture for at-least three months before you will need to replace it.
 Let me know in the comments section which mixture of oils you used. Remember that shaking the mixture will release more scent into the air but with all air fresheners if you live with them and smell them daily they wont smell as fragrant to you as they would to a visitor to your home.
This recipe is so easy I will not have to make a recipe card for it.
What: baking soda and essential oils of choice
How: put the amount of baking soda you wish into the container of your choice and drop a few drops of your favorite essential oils or essential oil mixture.
When you notice the odors coming back simply shake the mixture, you can shake the mixture for at-least three months before you will need to replace it.
You can find a glass jar with a slotted lid at any thrift store, or you can make your own using cheesecloth and a bit of twine. For that you will need a glass jar with a lip (a mason jar will work), cut a piece of cheese cloth to fit over the top and tie it on around the mouth of the jar. If you have a mason jar with the original lid you can simply cover with the cheesecloth and screw on lid without the inner plate.
Baking soda naturally wicks away odors, by adding your favorite essential oils you then replace the odor that the baking soda took away with your favorite scent.
The first time I made this air freshener I used only peppermint oil. It was nice but something I got tired of after a few days. The second time I used a mixture of lemon, wild orange, and lime. This mixture smelled like a bag of skittles and was delightful.
Many people use this recipe, from the farmers wife to the store owner it has been around and loved for many years. The first time I used the recipe was when my chicks were living in their brooder box in the basement; it definitely came in handy!
My favorite thing about this mixture is how simple it is and how simple it smells. I'm not sure if you have ever noticed the burning sensation in your nose that some candles, sprays, or fresheners give off, but you don't have to worry about that with this recipe.
Let me know in the comments section which mixture of oils you used. Remember that shaking the mixture will release more scent into the air but with all air fresheners if you live with them and smell them daily they wont smell as fragrant to you as they would to a visitor to your home.
Thanks for reading!
-Kayla
From my workspace to yours: Vol. 1
Saturday, September 14, 2013

One of the most used (and complained about) ingredients in my recipes is beeswax. While there are no complaints about all of the wonderful properties beeswax adds to the recipe, there are many about working with it. After I made my first recipe with beeswax I honestly shuddered at the thought of having to use beeswax again. Through trial and error I have learned a few tricks that make my life a lot easier. In this post I plan to share some of the tips I have learned along the way that makes it simpler for me to enjoy working with beeswax.
1. Beeswax cubes: In the photo above you can see my tiny beeswax pyramid and a container full of what look like beeswax ice cubes. The very first thing I noticed about working with beeswax was how hard it was to cut, and how many shavings fell on the floor while I was cutting it. Although I was being tedious about slicing it I made a big mess and had tiny slivers of beeswax everywhere.
My Solution: I became curious about pre-measured beeswax cubes, and wondered how much beeswax would fit in each space of an ice cube tray. To my surprise roughly one tablespoon; I figured this out first with water of course.
How to: In order to melt the beeswax you can either lay the whole block in your double broiler or melt it in your Crockpot (explained in #2). Then simply pour the beeswax into the ice cube tray and let it harden overnight. When it is ready bust the beeswax out the same way you would ice and store your cubes in an airtight container or bag.
2. Beeswax in my Crockpot?
While this idea may sound crazy, trust me! I couldn’t get over how cumbersome it was to quickly pour the exact measurement of beeswax I needed into the container I was using, or into a mixing bowl from the double broiler. Another complaint I had was how the double broiler either used all of the water very quickly or got a little too hot, too fast and the beeswax smelt a little burnt. The beeswax wouldn’t turn black or anything but the pleasant smell of beeswax became the smell of charred beeswax. Oh, and then I had three containers to clean with hardened beeswax on them…
My Solution: Before the beeswax cubes came the tiny Crockpot. You know the kind I’m talking about; usually they are used for warming candles or potpourri. You can buy one online (here), or if you would like the country themed (cheaper) version pick one up in a thrift store like I did (maybe you will get lucky and find one with ducks on it).
By allowing the beeswax to melt slowly you don’t have to worry about overcooking it or a big cumbersome pot. You can also let go of any worries about burning your hands because it doesn’t get as hot as your double broiler. The only negative thing I have noticed with this method is the time it takes to melt. So usually I turn on the tiny Crockpot, put the beeswax in it and get busy gathering the rest of my supplies and ingredients for the recipe. As the saying goes, a watched pot never boils!
How to: I believe you could also use either a mug warmer/ candle warmer it’s the same concept, but without sides (like this).
Once I found my Crockpot, I found a mason jar that would fit in it. Whether or not you decide to make the beeswax cubes it’s so much easier to be able to add the beeswax, and/ or coconut oil, Shea butter, etc. and then remove the mason jar from the Crockpot to add the final ingredients that do not require direct heat (such as the essential oils) before you pour your mixture into its final container(s).
If you are planning to make beeswax cubes of your own, using the tiny Crockpot method comes in handy. You have better control with your pouring and you do not need pot holders (please use your judgment here, test your melted jar of beeswax for temperature before picking it up, your Crockpot may get warmer than mine).
3.Freeze your beeswax!
Well to be honest I’m not sure if there are any benefits in freezing beeswax, but there is a huge difference in cleanup! When the recipe is finished and you have your nice new product before you, you also have the task of cleaning up the melted beeswax. Why should this be a chore?
My Solution: My mother taught me how to freeze candles to remove them from the container they are in so I could use the container for a different candle. When the candle is frozen it contracts and pulls away from the sides/ bottom of its holder. With beeswax you are working with the same concept.
How to: Place your dirty beeswax jar, into the freezer and leave to sit over night. When you go back to it in the morning you should be able to simply chip it away from the glass. Washing beeswax from a container is terrible, you end up spreading it everywhere and you have to wash the dish cloth before you can use it on anything else, ugh it’s just a mess. You can also use this method to get a product you have made out of a container if it includes beeswax, like lip-balm.
How to: While this method may be old news to some of you, if you don’t know about it already you will love this trick! For this trick you will need a clothes iron and a brown paper bag. Place the brown paper bag on your carpet where the beeswax or candle spill is then iron (on a low setting) over the brown bag. You will see the brown paper bag begin to wick the wax away from your carpet and it’s almost like magic!
I believe this sums up the beeswax tips, if you have any that I could use please leave them in the comments section below. If you would like to share this post feel free to do so, if it has helped you it will likely help someone you know! E-mail me with any other questions or concerns and as always thanks for reading!
-Kayla
All natural foaming hand soap recipe
Saturday, August 31, 2013

One of the things in our home we couldn't go without was our foaming hand soap. There is nothing that compares to the pleasure of foaming soap. Don't ask me why but I love the way the foam feels compared to regular hand washing soap. Since I made this soap recipe I have had to refill our container several times, and honestly it's nice to know people are using it. As nice as it is to have foaming hand soap it is equally disturbing to see a hand soap container with dust on it sitting in someones bathroom. Trust me there is no time for dust with this hand soap. Every one in our home loves it, and like I said I've had to refill it several times! So, where is that recipe?

-Final Notes
*The Container... Usually I tell you to use the container of your choice however, with this recipe you will need the right pump to get the foam! You can follow my lead and use a recycled container or buy a new one.
**Always use the essential oils you enjoy best. The first time I made this recipe I used Lemon Essential Oil, and Lime Essential Oil. Since then I have stuck with Wild Orange Essential Oil mixed with Lime Essential Oil. If you are mixing oils, I would advise to only use 5 drops of each oil. If you are using a single scent use 10 drops.

Make sure to add the essential oils to the soap before adding in the water. Otherwise your essential oils will float to the top and remain separated from the soap and water. This isn't the worst thing ever, but it will leave your soap scentless until the last few pumps.
Dr. Bronner's Magic soaps are wonderful. I have purchased two containers so far. The first container I bought was the smallest size they had so I could try it out. The second time I bought it I got the 32 oz. size. I have had this container for a few months and because the soap is so concentrated it really lasts for a while. You only need a little bit per recipe, with this soap a little really does go a long way.
 This recipe is SO simple, and treasured in my home! Leave your comments below letting me know what you think of this recipe and which essential oils you chose to use if any.
Thanks for reading! -Kayla
All Natural Raw Sugar Scrub
Sunday, August 11, 2013

The first natural product I ever made (at 15 years old) was a recipe very similar to this one. I don't remember all of the details of what we used in that particular recipe; but I can tell you I used this mixture as sparingly as possible because it worked so well and I didn't want to waste the beautifully fragrant, exfoliating scrub that I made. This recipe can be shaped so easily to meet your personal needs. If you work a physical job and need to relax your muscles at the end of the day you can add peppermint oil to the recipe, there are so many options I'll get into more detail as we go.. but first let me introduce you to this facial/ body scrub!
After I made this oil for the first time (at fifteen years old) I have never been able to find an exfoliating product that comes close to matching it. Most that you buy in the store leave your skin feeling dry and rough, and the exfoliant in the store bought scrubs is usually a tiny gummy feeling bead that sticks to everything (skin, shower, towel, hair).

-Final notes-
-The raw sugar helps to break away dead skin, and the hemp oil jumps in behind it to seal in the moisture, to be honest I don't need any lotion after I use this because my skin is so hydrated (not oily, but hydrated). I only recommend using this scrub two or three times (maximum) a week. It is very effective and you do not want to break into any new skin, I personally only use it twice a week.
-*Oil of choice- While some of you may say "my oil of choice is hemp oil" others either do not have access to it or simply prefer another oil. You can replace Hemp oil for Olive Oil, Sunflower Oil, Rose-hip Oil, Grape-seed Oil, Jojoba Oil, pretty much any carrier oil will do the job. I prefer hemp oil because it has all of the nutritional values of all the oils mentioned above plus a few. It heals the skin, hydrates the skin, prevents the formation of unhealthy skin cell growth, promotes the growth of healthy skin cells and detoxifies your skin.

-When I say essential oil of choice I mean what would you like your Sugar scrub to accomplish for you? Are you fighting body and face acne and need a little help with a deep cleaning essential oil/ raw sugar blend? Let me give you a few examples:

I'm pretty sure I summed up all the information I needed to in this article. You would think for a recipe that consisted of very few ingredients and very little effort there wouldn't be much to write about! I hope you all enjoyed this post and I'm excited to see what essential oil blend you choose. If you have any essential oil blend requests e-mail me Kayla@healing-salve.com and I will try to find a good solution for you! Thanks for reading, share with those you love, and enjoy!
Namaste, Kayla
After I made this oil for the first time (at fifteen years old) I have never been able to find an exfoliating product that comes close to matching it. Most that you buy in the store leave your skin feeling dry and rough, and the exfoliant in the store bought scrubs is usually a tiny gummy feeling bead that sticks to everything (skin, shower, towel, hair).
-Final notes-
-The raw sugar helps to break away dead skin, and the hemp oil jumps in behind it to seal in the moisture, to be honest I don't need any lotion after I use this because my skin is so hydrated (not oily, but hydrated). I only recommend using this scrub two or three times (maximum) a week. It is very effective and you do not want to break into any new skin, I personally only use it twice a week.
-*Oil of choice- While some of you may say "my oil of choice is hemp oil" others either do not have access to it or simply prefer another oil. You can replace Hemp oil for Olive Oil, Sunflower Oil, Rose-hip Oil, Grape-seed Oil, Jojoba Oil, pretty much any carrier oil will do the job. I prefer hemp oil because it has all of the nutritional values of all the oils mentioned above plus a few. It heals the skin, hydrates the skin, prevents the formation of unhealthy skin cell growth, promotes the growth of healthy skin cells and detoxifies your skin.
-When I say essential oil of choice I mean what would you like your Sugar scrub to accomplish for you? Are you fighting body and face acne and need a little help with a deep cleaning essential oil/ raw sugar blend? Let me give you a few examples:
- Acne or black head clearing scrub: Use 5 drops of tea tree (also known as melaluca), 5 drops of lemongrass, and 10 drops of Lavender
- Muscle aches or hot flashes: 10 drops of peppermint
- To reduce cellulite and tighten elasticity of skin: 5 drops Rosemary, 5 drops Lime, 5 drops Lavender
- Energizing: 10 drops Lemon
- Stretch Marks (or others scars): 5 Drops Frankincense, 5 Drops Myrrh, 5 Drops Lavender
**Container Issues: If you are going to keep this oil in the shower at all times I recommend using a plastic container or an old spice container (not the fragrance old spice, but an old garlic powder or onion powder container). Why? Well when you go to dip your hand into this mixture your hand will be oily and if you use glass in a shower.. you may end up needing healing salve! Also if you put this mixture into an old spice container you do not have to scoop out anything, you can shake it out through the large holes. If you plan to use this after you shave your legs or on your face and you will be using it outside of the shower a glass container is an okay choice. If you want to know why mine is in a glass container, let me explain: I made a base mixture (of the raw sugar and hemp oil), I mixed it up and now I store it in this container. Since I may only need an acne scrub for a week or two I didn't think it made a lot of sense to make a whole batch of acne scrub, because I only get the occasional pimple. I have an acne scrub, a muscle ache scrub, and I have the choice to whip up a new essential oil blend to add to my base at any time; so you see why I keep mine in a glass jar. I keep this glass jar out of the reach of children with the other ingredients I use to make my recipes.
I'm pretty sure I summed up all the information I needed to in this article. You would think for a recipe that consisted of very few ingredients and very little effort there wouldn't be much to write about! I hope you all enjoyed this post and I'm excited to see what essential oil blend you choose. If you have any essential oil blend requests e-mail me Kayla@healing-salve.com and I will try to find a good solution for you! Thanks for reading, share with those you love, and enjoy!
Namaste, Kayla
All natural lotion recipe
Thursday, July 25, 2013

With all of the anti-aging, skin tightening, and cellulite reducing creams on the beauty aisle which one should you choose? None of them! All these products are sure to include ingredients that are toxic, which actually enhances your problem areas. When you quit placing toxins on your skin and replace those products with an all natural remedy, your skin will thank you for it!
This recipe is amazing! First of all yes, it is green. =] However, as you can see from the photo when you spread it, it becomes clear! Second, I can feel my skin soaking up this lotion almost as if it is drinking it and my skin is not left feeling oily, greasy, or stiff. My skin after I use this lotion feels smooth and silky. It is actually hard to explain how awesome this lotion feels and how amazing it is that a lotion actually hydrates my skin! So... for the recipe!

-Final Notes:
-If you are anti-hemp (the hemp oil is legal by the way) you can use grape-seed oil, jojoba oil, or extra virgin olive oil. Although I can't vouch that non-hemp oil in this recipe wouldn't leave your skin feeling greasy.
-For those of you who love hemp oil as much as I do you already know the amazing healing benefits of it, but for those of you who are skeptic let me share some insights:
-As far as usage instructions go, typically I put this on before bed or immediately after my shower if its close to my bed time. As with all of my natural recipes you will be surprised at how little you have to apply, you will not have to apply it the same way you do conventional lotion. Try a small amount the first time to see how much you will need and go from there!
-If you are planning to use on your face here are some tips; if you use it on your whole face avoid getting it in your eyes, make sure to keep a check on your pillow case if it seems a little oily change it (or sleep with a microfiber towel over your pillow to absorb any extra oils) or else you may develop acne, and when you apply it feel free to bask in how good it feels on your face... it's really like a breath of fresh air for the face!
-This lotion is safe for your whole body from head to toe, it even helps heal dry skin on your feet!

Let me know in the comments section what your experience with this recipe was like! Send me a personal e-mail if you want tips on how to change up the recipe to fit any personal issues not covered in this recipe: Kayla@healing-salve.com. Until next time... stay green! =]
1. http://www.veria.com/herbs-supplements/hemp-oil-good-for-so-many-things#ixzz2a5VVSDhE
2.http://www.dailymail.co.uk/femail/article-2140435/The-hip-skin-balm-Its-secret-ingredient-supermodel-complexion-.html#ixzz2a5X2OUAA
This recipe is amazing! First of all yes, it is green. =] However, as you can see from the photo when you spread it, it becomes clear! Second, I can feel my skin soaking up this lotion almost as if it is drinking it and my skin is not left feeling oily, greasy, or stiff. My skin after I use this lotion feels smooth and silky. It is actually hard to explain how awesome this lotion feels and how amazing it is that a lotion actually hydrates my skin! So... for the recipe!
-Final Notes:
-If you are anti-hemp (the hemp oil is legal by the way) you can use grape-seed oil, jojoba oil, or extra virgin olive oil. Although I can't vouch that non-hemp oil in this recipe wouldn't leave your skin feeling greasy.
-For those of you who love hemp oil as much as I do you already know the amazing healing benefits of it, but for those of you who are skeptic let me share some insights:
- "Hemp oil is high in essential fatty acids. Omega 6 and Omega 3 are two main families of essential fatty acids that have therapeutic effects. Some use hemp oil to increase immune system strength, counteract aging, skin, and diseases such as cardiovascular disease. The essential fatty acids help correct oxygenation and skin hydration. Several studies indicate that the linoleic acid present in hemp oil can slow down the aging process of skin and fight psoriasis, a skin disease associated with dietary deficiency of fatty acids" (1).
- "Moisturizing, regenerating and revitalizing, hemp oil is especially useful for dry, tired or dehydrated skin. Skin regeneration and hydration of dry mature skin are enhanced through the use of hemp oil. It increases the skin elasticity and water retention capacity in tissues" (1).
"Not only is it rich in vitamin C and high in omega 3 and 6 fatty acids, known to heal scar tissue, it’s also a great source of retinoic acid, which studies show reduces the appearance of wrinkles and brightens skin. This combination means that it’s particularly good for fine lines and pigmentation problems — two of our most common skin complaints" (2).-If you do not have any essential oils, or wish to forgo adding them to this lotion, don't worry about it. As long as you use the hemp oil and rose-hip oil you will still see your skin healing, however all essential oils I added promote healing, help to brighten skin, remove age spots, keep bacteria from forming which causes acne, and smell fantastic!
-As far as usage instructions go, typically I put this on before bed or immediately after my shower if its close to my bed time. As with all of my natural recipes you will be surprised at how little you have to apply, you will not have to apply it the same way you do conventional lotion. Try a small amount the first time to see how much you will need and go from there!
-If you are planning to use on your face here are some tips; if you use it on your whole face avoid getting it in your eyes, make sure to keep a check on your pillow case if it seems a little oily change it (or sleep with a microfiber towel over your pillow to absorb any extra oils) or else you may develop acne, and when you apply it feel free to bask in how good it feels on your face... it's really like a breath of fresh air for the face!
-This lotion is safe for your whole body from head to toe, it even helps heal dry skin on your feet!
Let me know in the comments section what your experience with this recipe was like! Send me a personal e-mail if you want tips on how to change up the recipe to fit any personal issues not covered in this recipe: Kayla@healing-salve.com. Until next time... stay green! =]
1. http://www.veria.com/herbs-supplements/hemp-oil-good-for-so-many-things#ixzz2a5VVSDhE
2.http://www.dailymail.co.uk/femail/article-2140435/The-hip-skin-balm-Its-secret-ingredient-supermodel-complexion-.html#ixzz2a5X2OUAA
Body powder recipe
Tuesday, July 9, 2013

This is another amazingly simple recipe, using only three ingredients. If you are wondering why I am worried about making a body powder that doesn't contain cornstarch let me explain. When I was researching recipes for a friend who uses deodorizing body powder on a daily basis I found out that cornstarch promotes the growth of yeast. Every single baby powder or body powder on the market contains cornstarch. I asked the friend if she had ever noticed any problems with this (the yeast) and surprisingly enough she had regular occurrences of a yeast imbalance. I'm pleased to say she has been using this body powder recipe for several months and has not had any further problems.
You can use this powder as deodorant, feminine powder, baby powder, feet powder, or pretty much anyway you would use a regular body powder. Feel free to use any essential oil you wish to achieve the smell you like the best. Lavender has many healing properties so I used it in this specific recipe but you could also go without essential oils at all and just mix the powdered ingredients. I have really enjoyed studying the book Modern Essentials and learning about the proper way to mix essential oils.

Final Notes
-I used an old spice container that I found at a thrift store.
-Where do you find these ingredients? Email me for details Kayla@healing-salve.com

Please let me know how this recipe worked for you, share with friends/ family, and like ApotheKayla on Facebook to stay up to date with new posts! Namaste- Kayla
Simple Hair Serum
Tuesday, July 2, 2013

Whether you have curly hair, wavy hair, straight hair, coarse, fine, or medium textured hair we all tend to experience damaged ends and frizz. How can you use two common ingredients to tame the madness? Check out my recipe!
(NOTE: The Essential oils in this recipe are totally optional depending on your hair care needs!)

Final Notes: I have only had to use this a few times, it is amazing how my hair seems to adapt to this mixture and not need the serum as often as I needed the store bought versions. I believe the difference here is that there are no harmful parabens or sulfates that strip the hair; instead you have all natural ingredients that nourish the hair even after you shampoo again. When you pair this Serum with a natural shampoo (like this), or the "no-poo" method you get amazing results!
-Where do you find these ingredients? Click here for more information!

Let me know in the comments section below how this Serum has helped you, and which essential oils you chose to use in your recipe! Share with those you care for, and as always.. Namaste- Kayla
Subscribe to:
Posts (Atom)


Social Icons